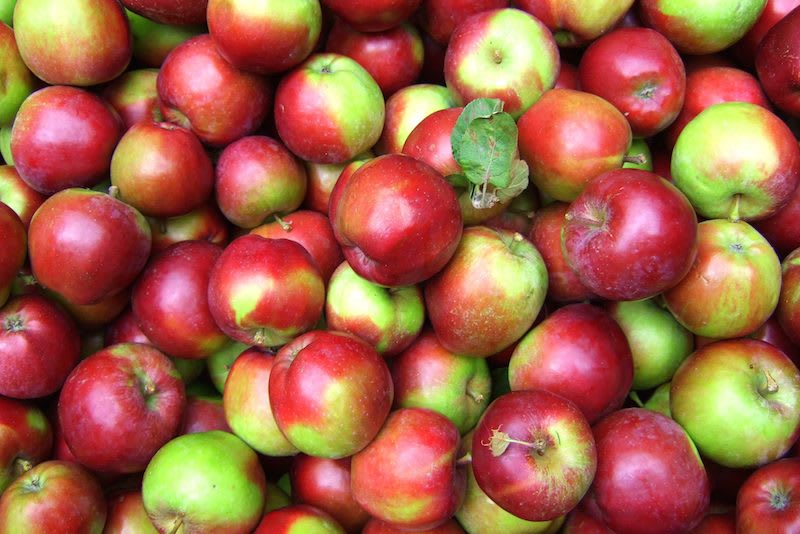
 The weather is quickly turning cooler and the days are getting shorter. It’s hard to believe that fall is finally here. When my children were young, they loved to go apple-picking, bringing home bagfuls of apples to use in all sorts of ways. There’s nothing like eating a crisp, juicy apple right off the tree.
Some people love their apples crisp and tart, whereas others prefer them sweet and juicy. Apples are very versatile and are popular in many desserts: they can be baked in crisps, pies, cakes, muffins or quick breads. My Baba Masha always had homemade applesauce in her refrigerator and baked apples were one of my favorite desserts.
Everyone is familiar with the popular saying: “An apple a day keeps the doctor away!” My new cookbook NORENE’S HEALTHY KITCHEN: Eat YOUR Way to Good Health (Whitecap) focuses on healthy eating and uses an apple icon throughout the book, with an apple on the cover as well.
Here is a terrific honey cake (just one of the 600 delicious, heart-healthy recipes in this 500 page cookbook that took me 4 years to write!) that is much lower in carbs than a traditional honey cake and has the added benefit of soluble fiber from the apples and carrot. It uses green tea as the liquid, so make a big pot of tea, use some of it in the batter, then pour yourself a cup and relax while it’s baking. Enjoy without guilt!
Apples ‘n Honey Cake
20 servings
This high, moist cake is ideal for the Jewish High Holidays because it combines three traditional ingredients—apples, carrot, and honey. A food processor helps speed up preparation. If you don’t have a large food processor, see Chef’s Secret below.
Ingredients:
- 3 large eggs (or 2 large eggs plus 2 egg whites)
- ½ cup canola oil
- 1 cup honey
- ½ cup lightly packed brown sugar
- 2 teaspoons pure vanilla extract or brandy
- 1½ cups whole wheat flour
- 1¾ cups all-purpose flour
- 2 teaspoons baking powder
- 1 teaspoon baking soda
- 2 teaspoon ground cinnamon
- 1/8 teaspoon salt
- ¾ cup cold tea (green tea is a great choice)
- ¼ cup orange juice (preferably fresh)
- 2 medium apples, peeled, cored, and grated (about 1 cup grated)
- 1 medium carrot, grated (about ½ cup grated)
Instructions:
- Preheat the oven to 350°F. Spray a 12-cup fluted tube pan with cooking spray.
- In a food processor fitted with the steel blade, process the eggs, oil, honey, brown sugar, and vanilla extract for 2 to 3 minutes or until smooth and creamy. Don’t insert the pusher into the feed tube while processing.
- Add the flours, baking powder, baking soda, cinnamon, and salt to the processor bowl. Then add the tea and orange juice and process with several on/off pulses, just until combined. Add the grated apples and carrot and process with several quick on/off pulses, until combined.
- Pour the batter into the prepared pan and spread evenly. Bake for 65 to 70 minutes or until a cake tester or toothpick inserted into the center of the cake comes out clean. Let cool for 15 minutes before inverting the pan and unmolding the cake onto a serving plate.
Freezes well for up to 3 months.
Nutrition Info: 206 calories per serving, 34.8 g carbohydrate, 1.8 g fiber, 3 g protein, 6.7 g fat (0.7 g saturated), 32 mg cholesterol, 142 mg sodium, 108 mg potassium, 1 mg iron, 45 mg calcium
Chef’s Secrets: Too much batter? If there’s too much batter to fit in your processor, process the eggs, oil, honey, brown sugar, and vanilla extract for 2 to 3 minutes. Transfer mixture to a large mixing bowl. Add the dry ingredients, tea and orange juice to the bowl; mix just until blended. Stir in the grated apples and carrot and bake as directed.
Source: Norene’s Healthy Kitchen by Norene Gilletz
Myra Goodman knows all about apples. She is the co-author of Food to Live By (Workman) and Myra and her husband Drew founded Earthbound Farm in 1984. She has been creating recipes and cooking with their organic food for years, creating flavorful fresh dishes using the bounty of the harvest. In her beautifully illustrated cookbook, she offers the following Field Guide to some of her favorite apples:
BRAEBURN: A fifty-year old New Zealand variety, it is prized for its crisp and juicy flesh and sweet-tangy flavor that’s excellent eaten fresh as well as cooked.
FUJI: It was developed in Japan by crossing a Red Delicious and the Ralls Janet, an heirloom that contributes an extra-crisp texture and sweet taste. Fuji is terrific eaten fresh or sliced on salads.
GALA: Originally developed in New Zealand, it is juicy and crisp, with a mild, sweet flavor. It’s best enjoyed sliced on salads or eaten fresh, rather than used in baking.
GRANNY SMITH: This variety has a bright green skin and crunchy, tart flesh, and makes an excellent cooking apple that’s also delicious eaten fresh. The apple is named for Maria Smith, who was an orchardist in the 19th century in Australia.
JONAGOLD: This variety combines the best of a tart Jonathan and a honey-sweet Golden Delicious – a delicious combination that’s great for salads and snacking, as well as for baking in a pie or crisp.
PINK LADY: This is the brand name for the Cripps Pink variety, with a pink-blushed flesh. Its popularity is due to a delightfully crisp texture and sweet-tart taste, as well as it’s pretty color.
Myra writes: “Just before the leaves turn red and amber, it’s time to search out the first freshly picked apples of the season. Thanks to their long storage life, apples are available year-round, perfect for my favorite warm apple crisp, topped with crunchy, buttery streusel and a scoop of slowly melting vanilla ice cream. This crisp is so simple to make, especially if you use an old-fashioned apple peeler and corer with a hand crank, which can be found at most kitchen stores.”
Myra Goodman’s Autumn Apple Crisp
Yields 1 (9×13-inch) crisp
Ingredients:
- 4 lbs. (about 10) small Granny Smith or pippin apples, peeled, cored and cut into ¼-inch slices
- Juice of 2 lemons
- 1 cup whole wheat pastry flour
- 1½ cups firmly packed light brown sugar
- 2 Tablespoons ground cinnamon
- 8 Tablespoons (1 stick) salted butter, softened
- Vanilla ice cream or Sweetened Whipped Cream for serving, optional (below)
Instructions:
- Position a rack in the lower third of the oven and preheat the oven to 375 F.
- Place the apple slices in a 9×13-inch baking pan. Add the lemon juice and toss to prevent the apples from discoloring.
- Place the flour, brown sugar, and cinnamon in a medium-size bowl and whisk to blend. Add the butter
- Using your fingers, blend the butter into the flour mixture until it resembles coarse meal
- Sprinkle the topping evenly over the apples, but do not pack it down.
- Bake the crisp until the apples are tender when pierced with a fork, the juices bubble up around the edges of the baking pan, and the topping is crisp and brown, 40 to 50 minutes
Serve the crisp hot or warm with vanilla ice cream or whipped cream, if desired
Source: Food to Live By, co-authored by Myra Goodman
Sweetened Whipped Cream
Makes about 2 cups.
Sweet whipped cream makes even a simple dessert special, adding a lavish touch to fresh fruit, pies, gingerbread, and cakes. While the texture is best if you use the whipped cream right away, any that’s left over can be refrigerated overnight, covered with plastic wrap. The next morning you’ll enjoy the special treat of adding a dollop to coffee or hot chocolate.
Ingredients:
- 1 cup heavy (whipping) cream, chilled
- 3 Tablespoons confectioners’ sugar
- 1 teaspoon pure vanilla extract
Instructions:
- Chill a medium-size mixing bowl and mixer blade in the freezer until ready to use (at least 20 minutes).
- Add the cream to the chilled bowl. Beat the cream, using an electric mixer, starting on low and increasing the speed as the cream begins to froth.
- Gradually add the sugar and vanilla and continue to beat until the cream holds soft peaks, 2 to 3 minutes. For the best texture, use whipped cream immediately, or refrigerate, covered, for up to 1 hour.
Here is a scrumptious apple-packed pie from my foodie-friend and cookbook author, Penny Eisenberg. It’s an excellent choice for those looking for a perfectly pareve pie to serve with a meat meal. This recipe uses a combination of three different kinds of apples – it’s totally apple-icious!
Penny’s Apple Pie
Serves 6 to 8.
MAKE DOUGH 1 DAY AHEAD
To create a flaky crust, I use shortening and add margarine and sugar for flavor. Using some cake flour ensures that the crust will be tender. Doughs made with margarine are softer than those made with butter, so I recommend refrigerating the dough overnight. For the filling, I like Granny Smith apples for their texture, Golden Delicious for sweetness, and McIntosh for tart apple flavor. Use spices to suit your taste.
Ingredients:
Flaky Pie Crust:
- 2 cups all-purpose flour, fluffed, scooped and leveled into measuring cups
- ½ cup sifted cake flour, spooned into a measuring cup
- 1 teaspoon salt
- 1 Tablespoon sugar
- 10 Tablespoons shortening, frozen and cut into ½-inch cubes
- ½ stick plus 1 Tablespoon (5 Tablespoons total) unsalted non-dairy stick margarine (such as Fleischmann’s), frozen and cut into ¼-inch slices
- ¼ cup ice water, divided
Filling:
- 5 medium Granny Smith apples
- 1 medium golden Delicious apple
- 2 medium McIntosh apples
- 1 cup packed light brown sugar
- 1 teaspoon cinnamon
- 1/8 teaspoon nutmeg
- ¼ cup cornstarch
- 1 tablespoon unsalted non-dairy stick margarine, cut into ¼-inch cubes
Glaze:
- 1 large egg white, whisked
- 1 teaspoon sugar
Instructions:
- Place the flours, salt and sugar in a food processor bowl. Pulse to mix everything together. Place the shortening and margarine on top of the dry ingredients. Pulse until the fats are cut into pea-size bits. Transfer the mixture to a bowl. Sprinkle on 3 tablespoons ice water. Mix with a fork and then, using your fingertips, press the mixture into a solid mass. If necessary, add more water to bring the dough together. Divide the dough in half. Wrap each piece in plastic wrap and refrigerate overnight.
- Preheat the oven to 425°F. with a rack in the middle of the oven. Grease and flour an 8-inch glass pie plate.
- Roll 1 piece of dough into an 11 or 12-inch circle about 1/8-inch thick (see sidebar). Fold the dough into quarters, transfer the dough to the pie plate and open the dough up so that it fits into the pan. There should be several inches of overhang. Trim the dough to ¼-inch beyond the rim.
- For the filling, peel, core and cut the apples into ¼-inch slices. Place 10 cups apples into a large bowl along with the brown sugar, cinnamon, nutmeg and cornstarch. Discard any remaining apples.
- Roll out the remaining dough making it larger than the bottom crust, so that it will fit over the mounded apples. Spoon the fruit into the crust-lined pie plate, mounding it high in the pan. Dot with the margarine. Add the top crust. Trim the top crust so it is the same size as the bottom crust. Squeeze the two edges together and then roll the edge up to make a nice border on the pan rim. Flute the edge with your thumbs or use a fork to press the edge down. Make 4 or 5 slits in the pie with a sharp knife. Brush the crust with the whisked egg white and sprinkle with the sugar.
- Place the pie on a baking sheet. Bake the pie for 25 minutes. Reduce the temperature to 375 degrees F and bake for another 30 to 40 minutes more until both the top and bottom crusts are golden. Cool at least 30 minutes before eating.
Tips: For a foolproof rolling method, cut open a jumbo zip-top bag so that it is hinged on one long side. Flour the inside of the plastic and place the dough inside. Roll the dough to 1/8-inch thickness, flipping the plastic over and flouring the dough as necessary.
For best results, the pie should not be made more than 8 hours in advance (leave uncovered at room temperature). Rewarm it at 350 degrees F. for 15 minutes. Leftover pie should be covered and refrigerated. Heat at 350°F to re-crisp the top crust.
Source: Amazing Dairy-Free Desserts by Penny Wantuck Eisenberg
Apples aren’t just for dessert! This delicious vegetable tzimmes comes from my friend cookbook author and food writer Ethel Hofman. It’s from the UK edition of Mackerel at Midnight, which is published by Mercat Press, Edinburgh. This recipe is quite unusual because it uses dried apples in combination with other dried fruits.
Ethel Hofman wrote:“Tzimmes is the Yiddish for a mixture – a mishmash of ingredients when all cooked together becomes a delicious, fragrant dish. It may be made with brisket but in our house, it was meatless made with potatoes, carrots, and dried fruits, then baked slowly in the oven. It’s absolutely irresistible!
Some form of tzimmes is always served at Rosh Hashanah, symbolizing a year of sweetness and happiness. It’s also excellent for Shabbat or any of the High Holidays. Enjoy!”
Ethel’s Vegetable Tzimmes
4 to 6 servings
Ingredients:
- 1 medium onion, cut in 1-inch chunks
- 2 medium carrots, sliced ½-inch thick
- 3 medium potatoes, peeled and cut in 1-inch chunks
- 1 cup dried apricots
- 1 cup pitted prunes
- ½ cup dried apple rings
- 1½ teaspoons salt
- 1/8 teaspoon pepper
- 3 Tablespoons dark brown sugar or to taste
- 1½ teaspoons ground ginger
Instructions:
- In a large, heavy pot, place the onion, carrots, potatoes, apricots, prunes and apple rings
- Sprinkle salt and pepper over. Stir in 3 tablespoons sugar and ginger
- Pour just enough hot water over to cover. Bring to boil over high heat. Reduce heat to simmer
- Cover and cook for 1 hour or until the vegetables are tender
- Add a little more hot water if mixture is getting too dry
Serve hot as a side dish with meats, fish or poultry.
Source: Mackerel at Midnight by Ethel Hofman
The words of this author reflect his/her own opinions and do not necessarily represent the official position of the Orthodox Union.